MCP Integration
Connector Guide
Seamlessly integrate AI Attorney's comprehensive case-law and statute search capabilities directly into Claude or ChatGPT.
Quick Start
Follow these steps to enable AI Attorney's case-law search. Ensure you have an active plan and your registered email address handy before starting.
Prerequisites
- Active AI Attorney account
- Claude or ChatGPT access
- Registered email
Connection Details
MCP Server URL
https://mcp.aiattorney.com.pk/mcpOnly required for Claude setup
OAuth Client ID
mcp-aiattorney-desktopOnly required for Claude setup
ChatGPT installation
Search AI Attorney in PluginsNo manual server URL, client ID, or secret is required
Claude Setup
1
Open Settings
Open Claude, click your account menu, and choose Settings.

2
Open Connectors
In Settings, select Connectors from the left sidebar.

3
Add a custom connector
Click Add, then choose Add custom connector.

4
Enter AI Attorney details
Enter Name as AI Attorney, Remote MCP server URL as https://mcp.aiattorney.com.pk/mcp, expand Advanced settings, enter OAuth Client ID as mcp-aiattorney-desktop, leave the OAuth Client Secret field empty, then click Add.

5
Connect AI Attorney
On the AI Attorney connector screen, click Connect. Claude will open the shared AI Attorney sign-in flow.

6
Confirm the connector is active
After sign-in completes, return to Claude and confirm AI Attorney appears connected with the available read-only tools.

7
Turn AI Attorney on in a chat
In a chat, click the plus button, open Connectors, and turn AI Attorney on for that chat when you want Claude to use it.

ChatGPT Official Plugin
AI Attorney is available directly in ChatGPT Plugins. No developer mode, server URL, or manual OAuth configuration is required.
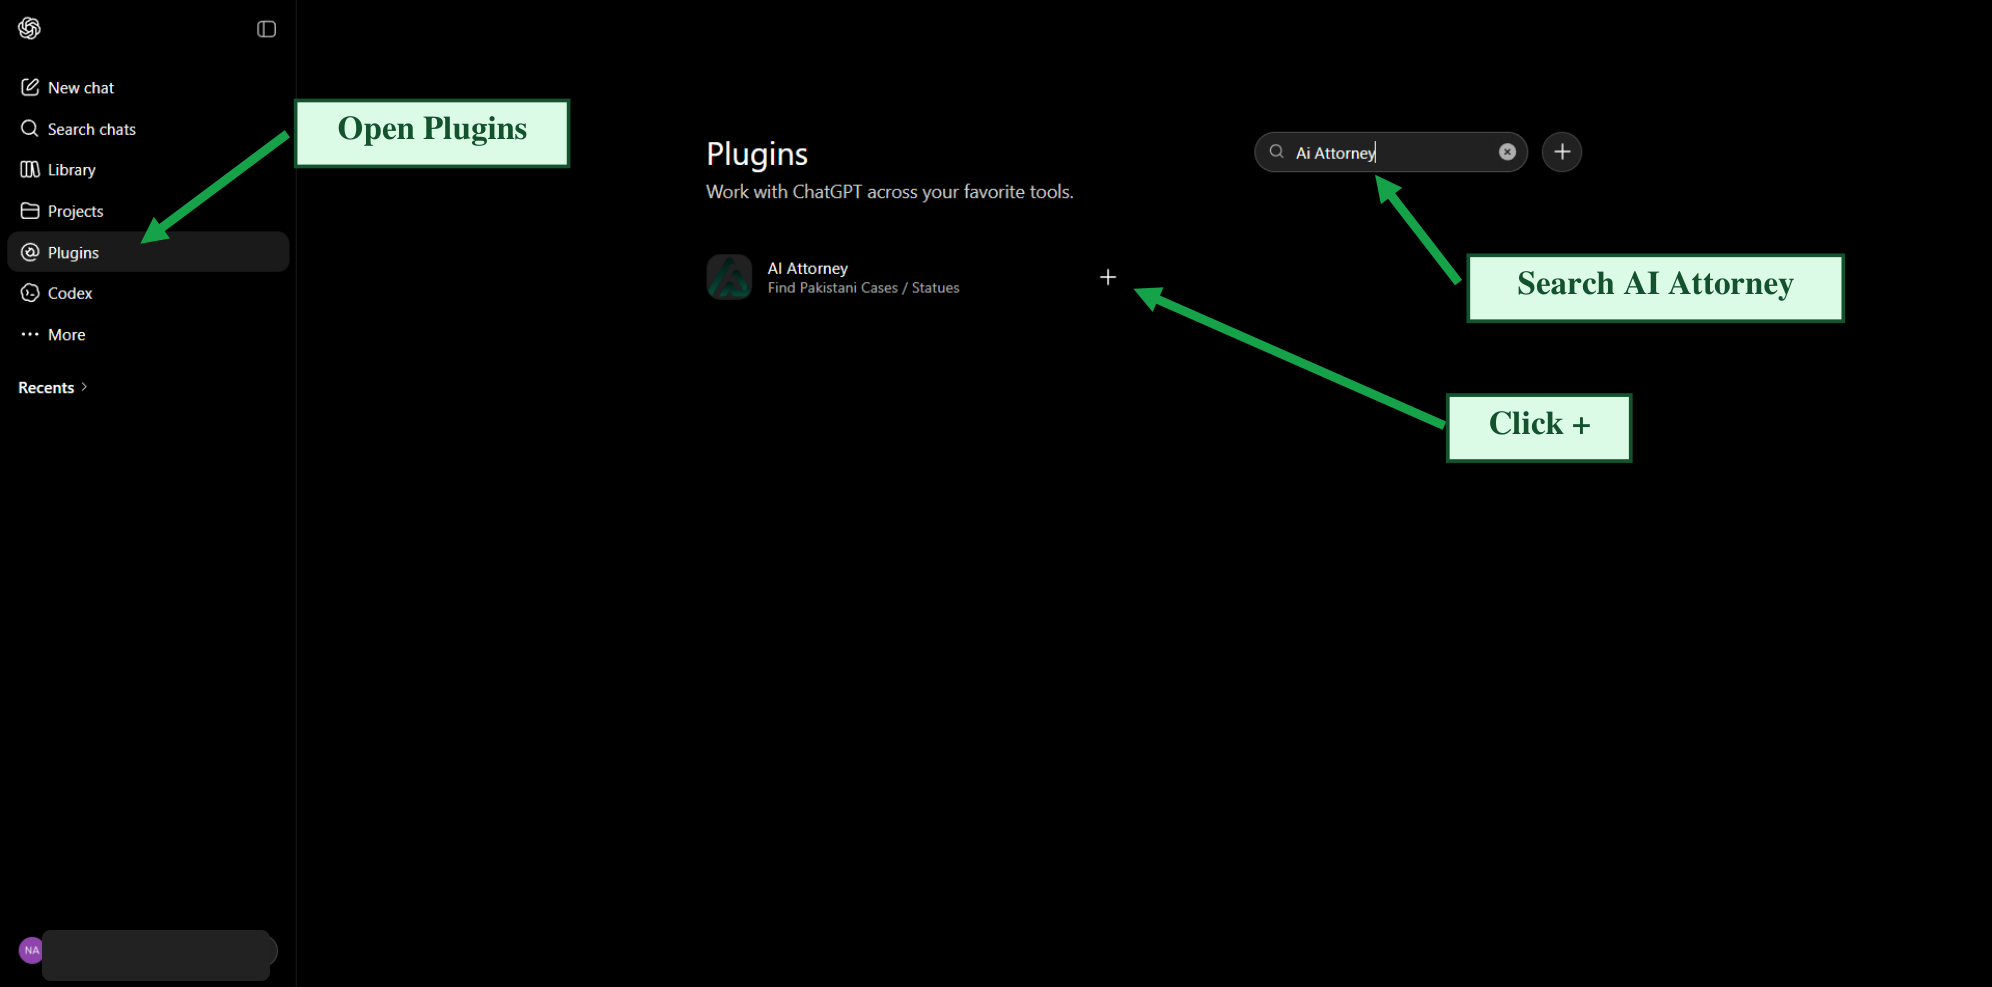
1
Add AI Attorney from Plugins
Open Plugins in ChatGPT, search for AI Attorney, and click the plus button beside AI Attorney to add it.
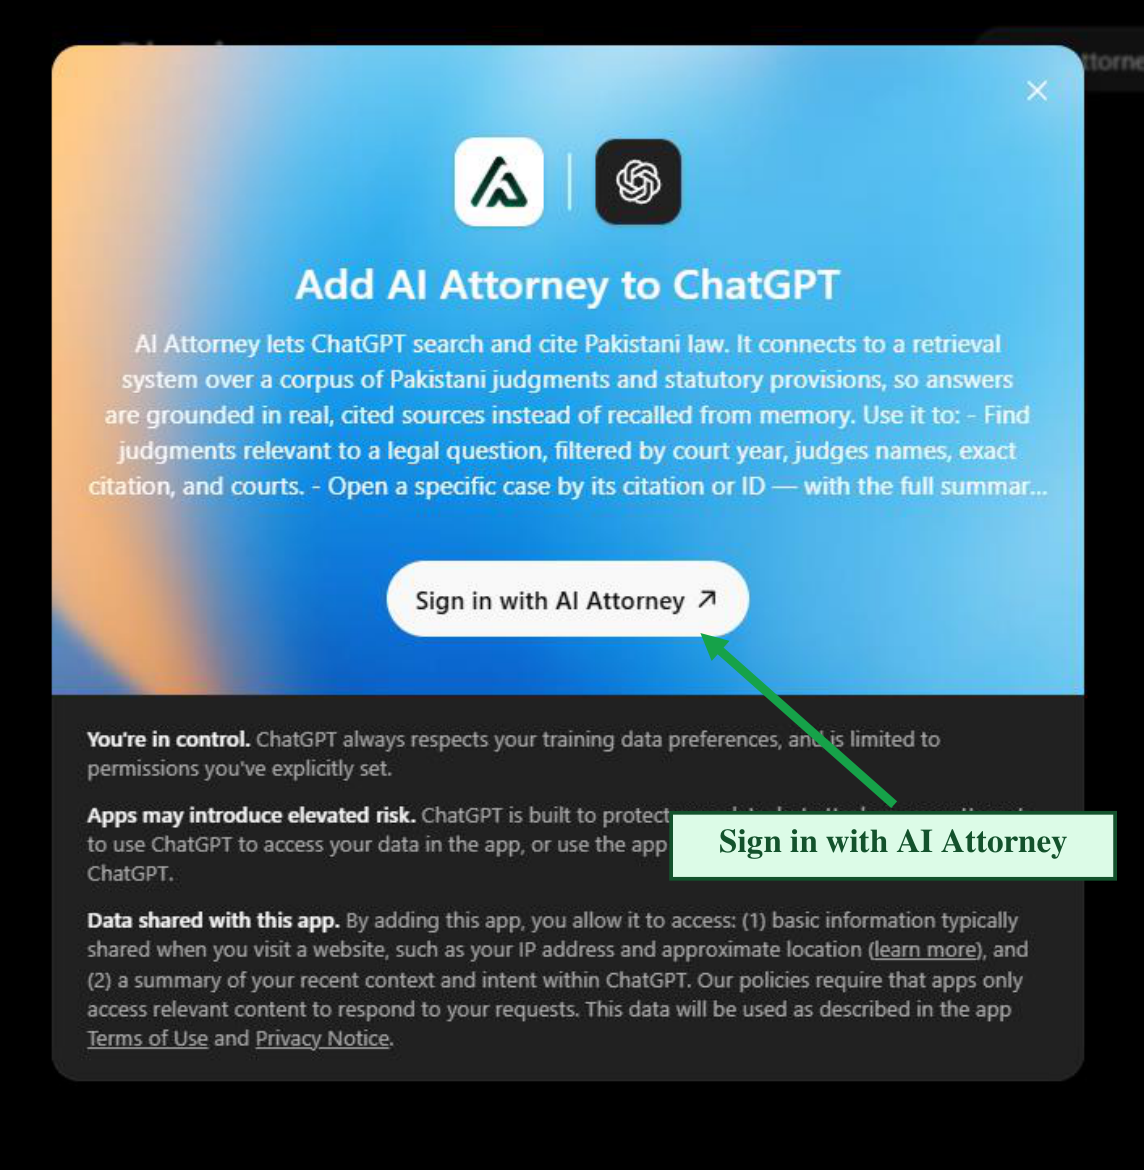
2
Sign in with AI Attorney
On the AI Attorney authorization screen, click Sign in with AI Attorney. ChatGPT will open the shared AI Attorney sign-in flow.
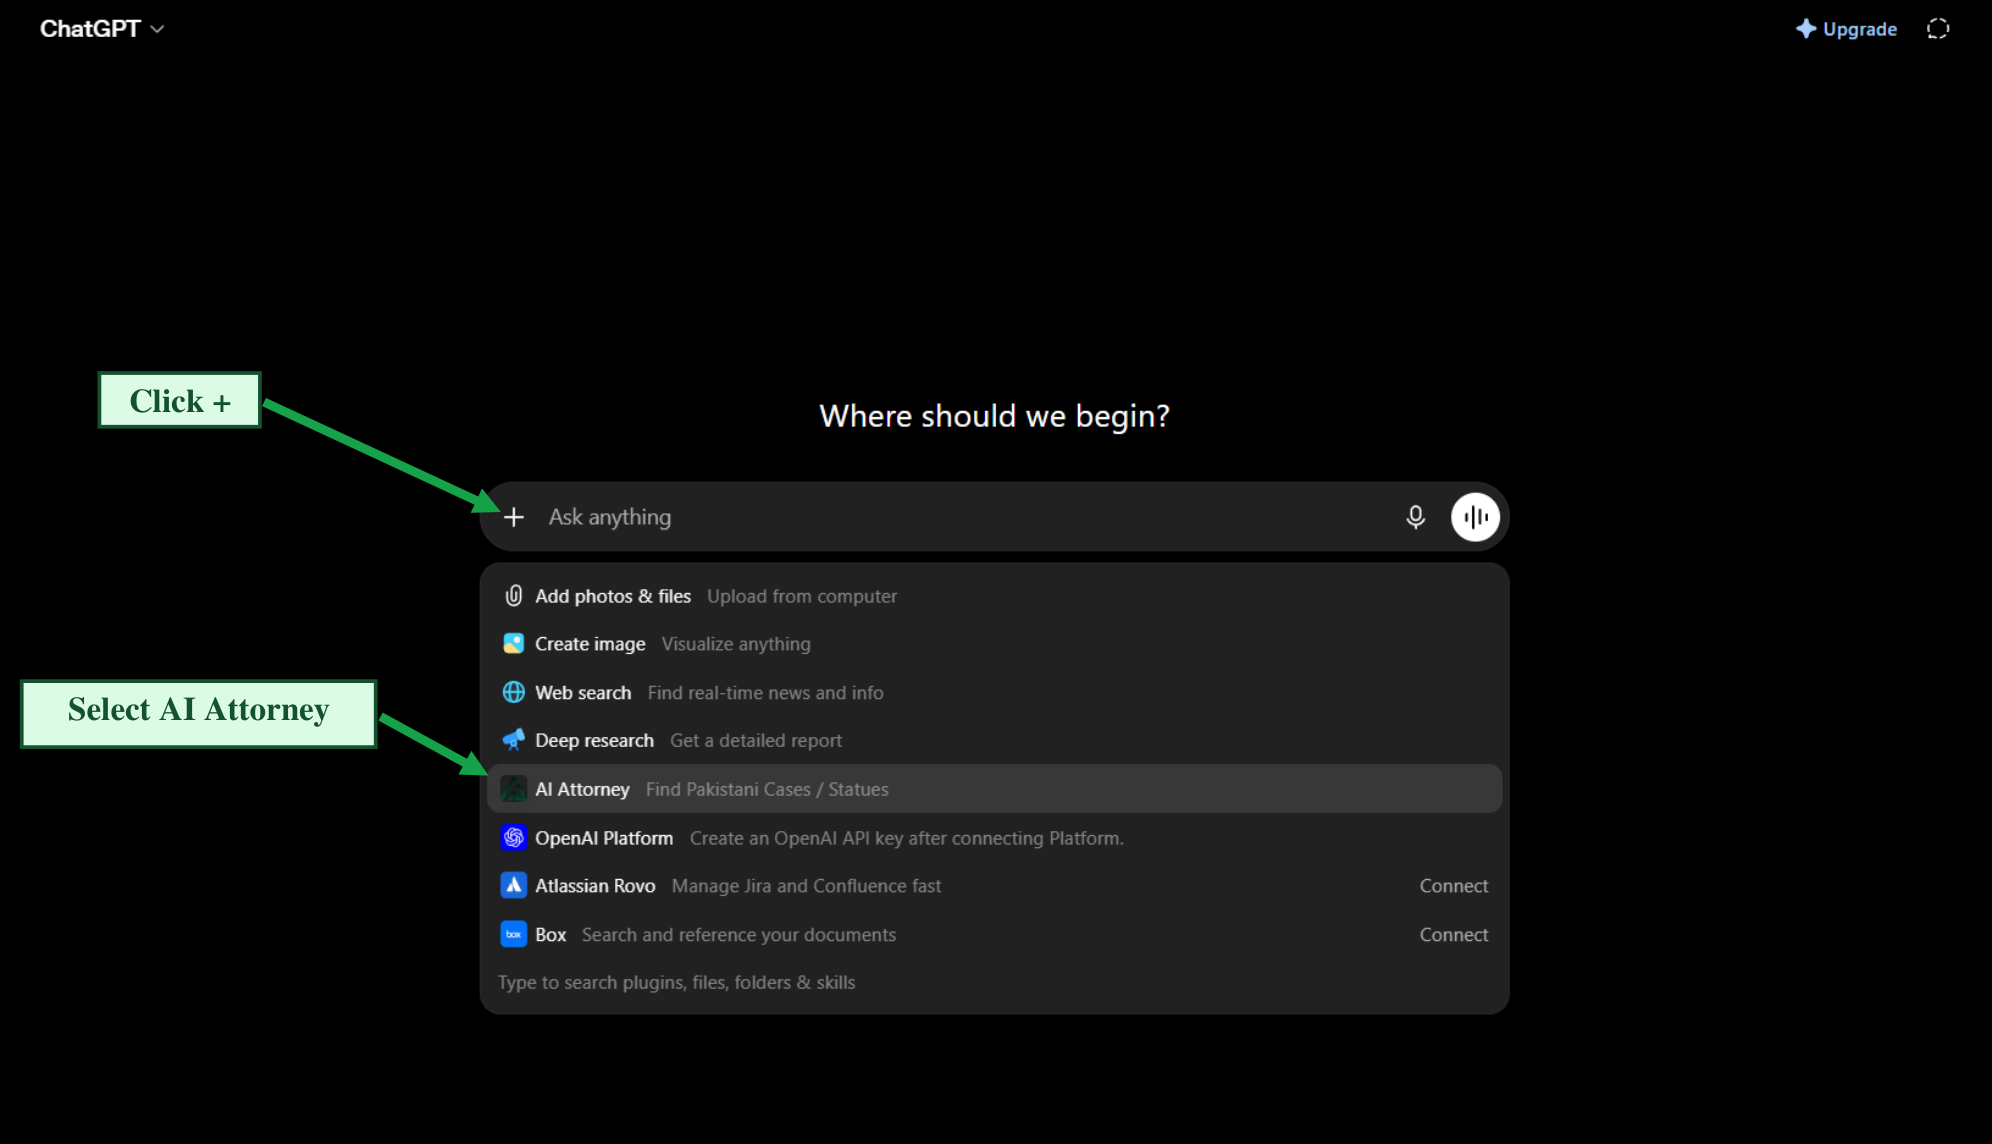
3
Select AI Attorney in a chat
After sign-in completes, start a new chat, click the plus button, and select AI Attorney from the plugin list.
Sign-in Flow
1
Enter your AI Attorney email
Enter the email address registered with your AI Attorney account, then click Sign In.

2
Enter the one-time code
Check your email for the one-time code, enter it on the page, and click Submit. After verification, the page returns you to Claude or ChatGPT automatically.

Use & Support
Ready to research?
Ask legal research questions normally in your connected AI platform. Each AI Attorney search uses your existing AI Attorney plan usage.
Need technical support?support@aiattorney.com.pk